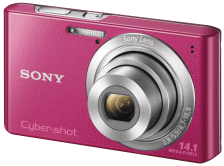
 In today's modern
technology, digital camera is widely preferred by amateur and
professional photographers. Sony digital camera is perfect blend of
latest style, design and features. Sony offers different camera
models in jazzy colors and look. Ranging from DSLR camera to
PowerShot series, Sony camera is superb way to capture your memories.
The camera uses SD, SDHC flash memory card to store pictures and
other multimedia files. Since these storage devices are highly
subject to corruption photo loss from Sony digital camera is not an
exception. In such a particular case, there is need to good photo
recovery program to recover lost picture files.
In today's modern
technology, digital camera is widely preferred by amateur and
professional photographers. Sony digital camera is perfect blend of
latest style, design and features. Sony offers different camera
models in jazzy colors and look. Ranging from DSLR camera to
PowerShot series, Sony camera is superb way to capture your memories.
The camera uses SD, SDHC flash memory card to store pictures and
other multimedia files. Since these storage devices are highly
subject to corruption photo loss from Sony digital camera is not an
exception. In such a particular case, there is need to good photo
recovery program to recover lost picture files.

Photo loss from
Digital camera mainly occurs when memory card in which data is stored
becomes corrupted. This could be due to formatting memory card by
mistake, sudden power off or unexpected system down when data is
transferred from camera memory card to PC, virus infection or file
system damage on the card. As a result of all such issues when you
try to access photos, you may come across error message like “memory
card error”.
The error shows that
you cannot access photos neither you can save any new files on the
card. But you should never forget that photo never erased permanently
and can be easily retrieved using photo recovery software in an
effective way. The tool uses powerful algorithm to recover lost
photos from corrupted or formatted storage media. It thoroughly scan
the corrupted media and then retrieve the lost files. It offers safe
and quick photo recovery from digital camera, memory card, memory
stick,hard drive and other. It not only support Sony camera but with
Nikon, Canon, Samsung, Panasonic, Olympus and other popular brands.
It is available for Windows (Vista, XP, 2003, NT, 2000, 7) and Mac
(leopard, Snow leopard, Tiger, Panther) both.


USER GUIDE: HOW TO USE PHOTO RECOVERY SOFTWARE
STEP 1: First of all attach the media to the computer from where you want to recover lost data. Now select start scan button to start scanning process.

STEP 2: Select particular drive for recovering lost data

STEP 3: Select the desired file type that you want to recover

STEP 4: Start the scanning process

STEP 5: After scanning process is completed,you can preview the recovered file

STEP 6: Now you can select specific location to store the recovered data

No comments:
Post a Comment